|
Record the Macro |
|||||
|
1 |
Launch Excel |
||||
|
2 |
Save the workbook as PositionMeasures.xls. |
||||
|
3 |
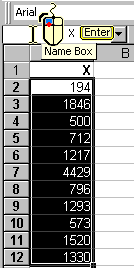
On Sheet1, enter this sample: |
|
|||
|
4 |
Select the sample (range A2:A12), click the Name box, type X and press Enter. |
|
|||
|
5 |
To activate the recording facility and name the macro as PosSumMeasures and do this: Invoke the Tools | Macro | Record New Macro command. |
From now on, any action you do in Excel will be recorded. When done, you will click the Stop Recording button. |
|||
|
6 |
Your first recorded action is to insert a new worksheet. To do this, right-click the Sheet1 Tab and, from the pop-up menu, select the option Insert… . |
||||
|
7 |
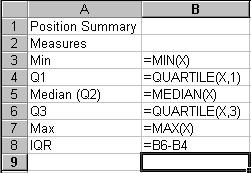
On the new sheet, enter these labels and formulas: Note: Do not worry about the column width now. |
|
|||
|
8 |
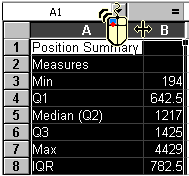
In order to adjust the width of the columns A and B, select the column headers (drag the mouse through them) and double-click on the border between the A and B headers. |
|
|||
|
9 |
To center the title in the rows 1 and 2 within the columns A and B, do this: |
|
|||
|
10 |
To unselect the range A1:B2, click any single cell (for example B3). |
||||
|
11 |
It is now a good time to stop the recording. Just click the Stop Recording button. |
||||
|
12 |
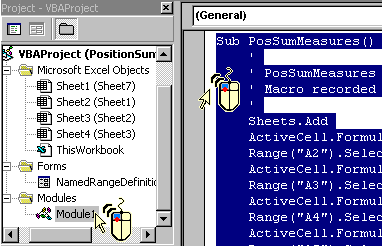
More interesting is to find out what Excel has recorded. Just run the Tools | Macro | Visual Basic Editor command. Next, open the Modules folder and double click the Module1 Module. In the Code window, with a few exceptions, your program should look like the following one: |
||||
|
Sub PosSumMeasures() |
|||||
' |
|||||
|
End Sub |
|||||
|
13 |
It is a good time to save your workbook. Just click the Save button. |
||||
|
Customize the Macro |
|||||
|
At this point, the PosSumMeasures macro generates the position summary measures for a sample named as X. If you wanted to reuse this macro for another sample, you would have to delete the current name X, and name the new sample also as X. Such an approach is cumbersome and may lead to errors. A better solution is to modify the macro so that it could generate the measures for any sample (having any name). The following steps show how to do it. |
|||||
|
14 |
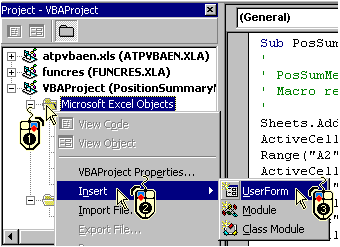
If necessary, switch to Visual Basic Editor. In the Project - VBA Project window, right-click the Microsoft Excel Objects folder and, from the pop-up menus, select the options Insert and UserForm.
|
||||
|
15 |
If the Properties window is not open, click the Properties Window button located on the Toolbar. |
|
|||
|
16 |
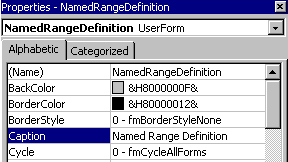
In the Properties window, double-click the Name property and type NamedRangeDefinition. Next double-click the Caption property and type Named Range Definition. Note Observe the form's Title Bar as you are changing the Caption property. |
|
|||
|
17 |
If the Toolbox window is not open, click the Toolbox button located on the Toolbar. |
|
|||
|
18 |
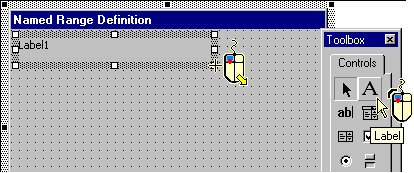
In the Toolbox window click the Label control and draw a box for the label on the form:
|
||||
|
19 |
To change the label's Caption, click the inside the Label box, erase the original text, and type the text Define the Sample Range Name. Reduce or increase the size of the Label box as necessary. |
||||
|
20 |
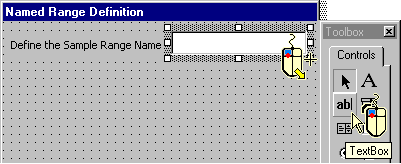
In the Toolbox window click the TextBox control and draw a box on the form next to the Label box:
|
||||
|
21 |
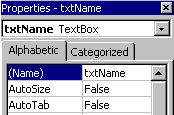
In the Properties window, change the name of this TextBox to txtName. |
|
|||
|
22 |
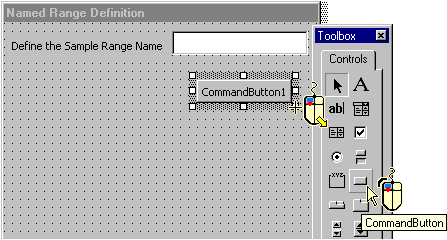
In the Toolbox window click the CommandButton control and draw a box for the button on the form under the TextBox control:
|
||||
|
23 |
In the Properties window, change the name of this CommandButton to cmdOK. |
||||
|
24 |
Click the button inside, erase the original name (CommandButton1) and type OK. |
||||
|
25 |
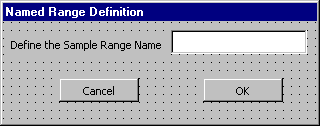
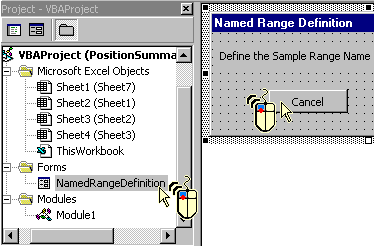
In a similar way add the Cancel command button (named is cmdCancel) and resize the form so it will look like the following one:
|
||||
|
Our next big task is to combine the recorded macro with the dialog box. First, we will need to move the PosSumMeasures procedure from Module1 to the form's code block. In other words, we need to hide this procedure so it can only be accessed from within the form. |
|||||
|
26 |
In the Project window, double-click the Module1 object. VB Excel shows the PosSumMeasures procedure in the Code window. Double-click anywhere in the selection area (the white left margin) in order to select the entire procedure and press Ctrl+X or click the Cut button.
|
||||
|
27 |
Switch back to the form by double-clicking the NamedRangeDefinition object and also double-click the Cancel button to get to the form's code window.
|
||||
|
28 |
Finally, move up to the beginning of the cmdCancel_Click procedure, press Enter (to insert a blank line), and move up again (to the blank line).
|
||||
|
29 |
Notice that VB Excel indicates that we are now in the General Declarations section of the code, which is where we can develop our own procedures. Now press Ctrl+V or click the Paste button to insert the PosSumMeasures procedure and press Ctrl+Home to arrive at the first line of this procedure. Note: There are a few lines that start with an apostrophe right below the procedure's header. These are comment lines. In Visual Basic, we use an apostrophe to mark our comments and remarks. Visual Basic's compiler ignores such comments. |
||||
|
The PosSumMeasures procedure needs a little surgery. First we need to create a text (string) variable that will retrieve the name of the sample range from the TextBox txtName. Next we will modify our statistical functions (MIN ( ), QUARTILE( ), etc.) in order to incorporate the variable name of the sample range. At this point, the functions still refer to the fixed name X. |
|||||
|
30 |
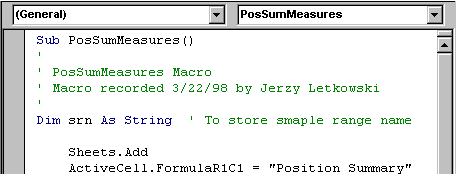
In Visual Basic, we use the Dim statement to declare a variable (a memory location to store some numbers or text).
|
||||
|
31 |
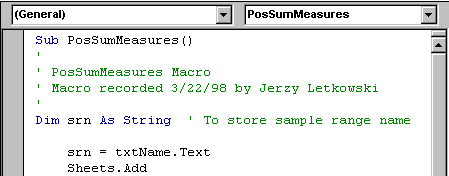
Right below, enter a line of code that will copy the Sample Range Name from the txtName TextBox to the srn variable (srn = txtName.Text):
|
||||
|
32 |
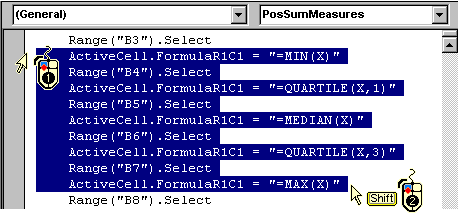
Scroll down to the line containing the MIN(X) function and select the block with all the functions referencing the fixed range name X. We must replace the fixed reference with a variable one.
|
||||
|
33 |
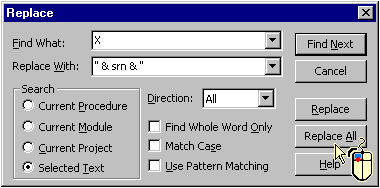
Instead of changing the X reference manually, we will use the Edit | Replace command. On the Menubar, click the Edit option and, from the drop-down menu, select the Replace option. In the Replace dialog box, type X into the Find What box, type
|
||||
|
34 |
VB Excel is expected to show this message box:
Click the OK command button. |
||||
|
35 |
As you can see, there are 5 function and 6 replacements. The Replace command has also replaced the letter X in the MAX() function name. We can fix it manually by selecting the wrong text:
and by typing X over this selection:
|
||||
|
Note: |
|||||
|
In Visual Basic, an ampersand character, &, is the text concatenation operator. Its job is to combine text together. For example, if the variable srn stores the name "Set", then the cell B7 will contain "=MAX(" combined with srn="Set" and combined with ")", all together producing =MAX(Set). Of course, the name Set must be a legitimate name of a spreadsheet range. Otherwise, Excel will accept the function, but the function itself will return an error. |
|||||
|
To wrap up our VB Excel application, we need a few more lines of code. First, the OK command button is to be associated with the PosSumMeasures procedure. Next, the behavior of the Cancel button must be specified. Finally, we must device a way to open the Named Range Definition dialog box. |
|||||
|
36 |
Switch back to the form by double-clicking the NamedRangeDefinition object in the Project window. To access the cmdOK_Click procedure, double-click the OK button. |
||||
|
37 |
Modify this event procedure by adding just two lines of code to it: |
||||
|
Private Sub cmdOK_Click() |
|||||
|
Call PosSumMeasures |
|||||
|
End Sub |
|||||
|
38 |
Copy the Unload Me line from cmdOK_Click and paste it to cmdCancel_Click procedure. |
||||
|
Private Sub cmdCancel_Click() |
|||||
|
Unload Me |
|||||
|
End Sub |
|||||
|
39 |
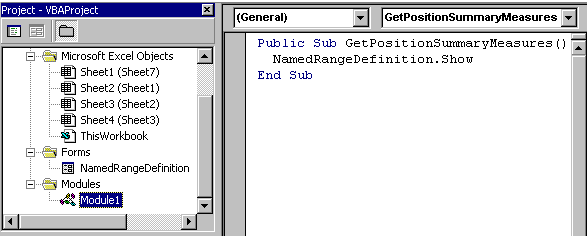
Switch to the Module1 Code window by double-clicking the Module1 object in the Project window and define the following macro procedure: |
||||
|
|
|||||
|
40 |
It is a good time to save your workbook. Just click the Save button. |
||||
|
41 |
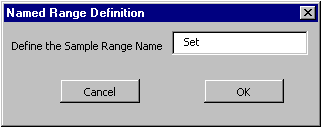
To test the macro, via the Taskbar, switch to Excel worksheet. Next, using the Insert | Name Define | X | Delete | OK command, remove the name X. Name the sample in the range A2:A12 as, for example, SET, and run the GetPositionSummaryMeasures macro (Tools | Macro | Macros | GetPositionSummaryMeasures | Run).
|
||||
|
42 |
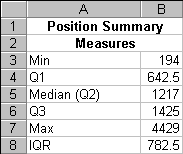
As before, the macro is expected to produce this output:
|
||||
|
43 |
Your macro is able to work now with any named range. |
||||
|
44 |
Try to improve this macro so it will handle predictable error situations. Can you make this macro work also with regular ranges (A2:A12)? |
||||

